Create an Amazon Business Account

Join Amazon Prime - Watch Thousands of Movies & TV Shows Anytime - Start Free Trial Now
Fighter Aces Of The 7th Fighter Squadron
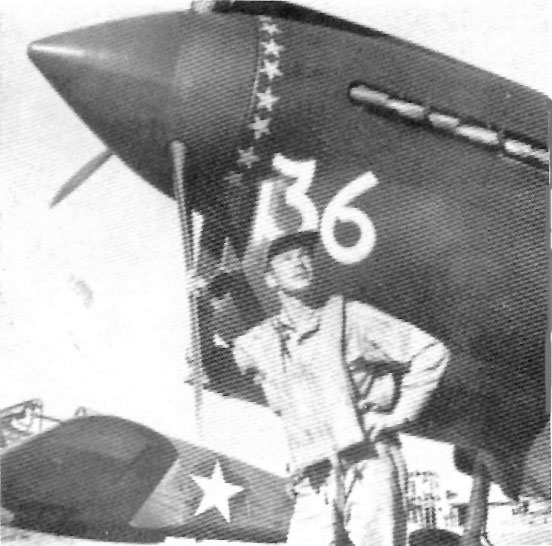
Java ace Bill Hennon of the 7th FS
Part Two: Holding The Line
The 7th Fighter Squadron re-deployed to the newly constructed Batchelor field, just south of Darwin, in
April 1942. Thus, they joined the 8th and 9th FS in the defense of Darwin. The 8th FS moved onto their
new field, later named Strauss field, 30 miles north of Batchelor. As the 7th settled in to their new base,
the 9th began moving north to Livingston field. By the beginning of May, the 49th was well disbursed on
three airfields to the south and southeast of Darwin.
For the month of May, the Japanese kept a low profile and the 49th had little to do except fly patrols and
train. It was during this quiet time that fighter ace Bill Hennon, the Operations Coordinator of the 7th FS,
had painted the image of a mythical Java jungle demon on his P-40s vertical stabilizer. Called "Bunyap",
the demon typified the fierceness of Hennon in combat and the squadron soon adopted the image and
the title "Screamin' Demons".

After the stunning set-backs at the Coral Sea and at Midway, the Japanese decided to concentrate on
eliminating the remaining Allied air units in the Southwest Pacific. Port Moresby and Darwin were both
selected as targets.
Unsure of the exact strength of Allied forces in the area of Darwin, the Japanese launched a series of
raids beginning on June 13, 1942. After almost 90 days of inaction, the Japanese sent 27 G4M bombers
escorted by 45 A6M2 Zeros to pound the RAAF airstrip and the docks of Darwin. The first P-40s to get
to the attackers were the from the 8th FS standing patrol. Grossly outnumbered, the 8th was badly shot
up and never got near the bombers. With only one confirmed kill, the 8th lost one P-40 and three more
limped home badly damaged to be written off. The 7th arrived too late to join in.
The next day, the 7th found themselves in the thick of the fight. The Japanese sent 9 Bettys and 27 A6M2
Zeros to attack the harbor and docks. This time, however, they split the bombers from the escort, thus
providing an effective screen. The 8th FS never made contact with either group of aircraft. The 7th and
9th squadrons ran into the escorts over Middle Arm inlet. Captain Nate Blanton, a veteran of Java, led
his 7th FS flight down from 20,000 feet, attacking the Zeros of the Japanese 3rd Ku. Within only seconds,
Blanton had blasted 2 Zeros, one fatally. Now fully alerted, the remaining 25 Japanese veteran pilots
responded quickly. One P-40 was clobbered by two Zeros and burst in flames. Its pilot, combat rookie
Lt. Keith Brown managed to bail out over the RAAF airstrip just south of Darwin. Landing in a tree and
breaking his leg, Brown was quickly rescued by RAAF personnel who were watching the air battle. A bit
singed and in substantial pain, Brown was rushed to the RAAF hospital for treatment.
As the remaining three 7th FS pilots broke off the fight, a four plane flight from the 9th FS (the only 4 of
twelve 9th FS P-40s to find the Japanese) arrived and weighed into the 3rd Ku. This flight, led by Andrew
Landers, sent three Zeros down on fire. After 30 minutes of continuous air combat, the 3rd Ku headed
for home. The pilots of the 7th and 9th squadrons, totaling only 8 aircraft, outnumbered better than 3 to 1,
had managed to destroy four enemy fighters for the loss of only one of their fighters with the pilot injured, but alive.

June 16th brought yet another Japanese raid. 27 G4M bombers escorted by 27 A6M2 Zero fighters once
again approached at high altitude. The 8th FS went up to attempt an interception. Climbing up to over
26,000 feet, they were met by the Japanese escorts. At this relatively high altitude, the P-40 is woefully
low on power. Making matters worse, the Zeros were higher still and came down at speed, scattering
the flight. Some of the 8th's pilots elected to try to maneuver with the Zeros, with the usual result. One
P-40 was shot down, its pilot lost without a trace. Two others failed to return, one running out of fuel,
the second suffering engine failure and ditching along the coast. Both pilots were recovered uninjured.
The 9th FS got into the scrap as well, claiming 2 Bettys and 2 Zeros as destroyed. Two of the P-40s were
hit, one making a dead stick landing in a clearing. The second bellied in safely. No pilots were lost. Post
war investigation reveals that while the 49th FG claimed 13 Zeros and two G4M bombers, the Japanese
report losing only 2 Zeros and no bombers. The Japanese records are called into suspect as the RAAF
reported finding the wreckage of 5 Zeros and 1 Betty. In contrast, the Japanese fighter pilots claimed
43 P-40s as destroyed. Group records indicate that 9 P-40s were lost to all causes over the four days.
Obviously, Japanese aircraft that crashed into the sea did not leave wreckage to confirm the kill.
Back at the 7th, the Operations Officer, Capt. Hennon, was somewhat less than happy with the Groups
performance. He raised hell with those pilots who tried to take on the A6M2 at high altitude alone. The
tactic Hennon expounded on was "hit and run". Time and time again, the inexperienced pilots would take
on the Zeros in turning fights. Worse, they were doing this at altitudes where the Allison engines of their
P-40s were pitifully low on power. Hammering this lesson into the heads of the young pilots would save
many of their lives and aircraft.
The Japanese did not return in strength until July 30th (they conducted
some limited night raids starting
on July 25th). Once again, G4M bombers escorted by Zeros arrived over
Darwin at about 24,000 feet.
The 7th was there to greet them. Diving in with little altitude
advantage, the P-40s were met mid way by
the Zero escort. In successive head-on passes the P-40s were able to
tie up the escort. Lt. Melikian was able to make a nose-on attack on a
G4M, the bomber last seen on fire going down. One additional P-40
was able to get a run in on the bombers. 2d Lt. Drake, having fallen
behind his squadron mates, saw an
opportunity to attack the second element of the bombers. Gaining
airspeed in a shallow dive, Drake closed
in and opened fire. The big G4M in his gunsight fell off on one wing,
mortally wounded. Drake then made
the rookie mistake of pulling into a steep climb to attack the first
bomber element several thousand feet
above. Taking a high angle deflection shot, Drake missed his target.
Unfortunately the pursuing Zeros
did not miss. Hammered by 2 Zeros, Drake's engine was hit, spewing out
hot oil and Prestone. With his
cockpit filling with smoke and fumes, the young 2nd Lt. went over the
side. Landing safely in the mild surf,
Drake waded ashore and was picked up by boat later that day.
Meanwhile, the fighters involved with the bulk of the escort had shot down 2 Zeros during their head-on
firing runs. Both Lt.s Poston and Steere each getting credit for one apiece. A four plane flight from the
9th FS executed a picture perfect bounce on the escort's second element and dove safely away leaving
four Zeros spiraling down in flames.
Upon being returned to the 7th Fighter Squadron, Drake received a thorough chewing out for trying to
fight in the vertical with Zeros hot on his tail. The fact that he received a confirmed kill for the Betty,
helped to offset the loss of his fighter. Drake was the only pilot who ignored the "hit and run" doctrine,
and the only pilot to be shot down. Hopefully, this time, the message would sink in.
Special thanks to William Pascalis, co-author of Protect & Avenge , for his advice and
wonderful book on the 49th Fighter Group without which, this story could not be written.
The 49th Fighter Group Association may be contacted at:
49th Association
PO Box 41539
Mesa, Arizona 85275-1539
ADITIONAL RESOURCES:
U.S. National Archives: Army Air Forces in the War Against Japan 1941-1945.
The 49th Fighter Group Association.
Return To Part One
Return To Planes and Pilots of WW2 Main Page

Unless otherwise indicated, all articles Copyright © Corey C. Jordan 1998.
Reproduction for distribution, or posting to a public forum without express
written permission is a violation of applicable copyright law. Some backgrounds
images
used on this website are the artwork of Corey C. Jordan. Reproduction for distribution,
or
posting these background images to a public forum without written permission is prohibited.
